Makerspace What Is Makerspace? To Design A Button
Button It's a button. Who makes the button? I do! Teens do! But how? Let's first discuss some basics about button making yesterday. Let's look at how to design your own buttons.
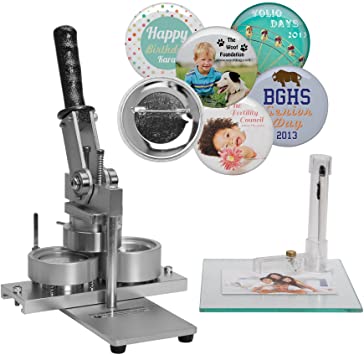
In this discussion a button insert is the final image of a circle cut to size. It is placed between the two components of a button that is the shell and pin back - which eventually becomes your button. It's the piece of graphic you design to make the button.
What Programs Can You Use To Create A Button
Let's begin with the final step. Although it might sound strange but the goal is to create a button insert which is appropriately size. The graphic element will allow your image to stand out. The last step is sizing and printing that button insert. Let's begin there. Once you choose to discover further information about button maker, you've to navigate to www.buttonmakers.net/ site.
In the last step, I would suggest using a software like Microsoft Publisher to finish your button design. This will allow you to make your button exactly to the size you want, and then print it. You can select an outline and then scale it to 2.25 if you're making an insert Shape feature. To ensure that the image you're after appears in the middle, you can use the fill feature or overlay it on the image.
Why Publisher?
It is essential to use a program for publishing which can properly handle graphics and prints true to size. For instance, if you create a circular image using PowerPoint however, even though on the screen it's sized to the right size, it doesn't print in the exact size since the size of a PowerPoint slide isn't the exact size of a sheet of paper. It's a computer-oriented program, not a print focused program. Publisher was designed to create and print printing materials. It's great to print button inserts.
You can also create the image in another software, and then copy it and copy it into Word at the right size. This is time-consuming. Word was my primary tool for a while, even though I just recently installed Microsoft Publisher on my laptop. While it's functional, it is more complex than I would like.
Publisher Is The Most Effective Way To Design Your Button
So let's go back to the beginning and design your button's design.
Let's be honest, if you're using Publisher to size and print your buttons, you can actually use it to design your entire button , if you choose. However, it's not the sole tool I utilize and there are other tools that offer other features that you may wish to look into.
While I would recommend finishing and printing using Publisher, you don't need to begin there. I most often don't. An example is that I may fall in love with an Instagram image and it is my starting point. You might create something online using Canva and then export it to publisher for printing and sizing. There are a variety of photo applications that allow you to add text, filters, and other elements to your image. I simply create my photo and then save it to my computer. I then insert it into Publisher for sizing and printing. Yes, some buttons take several steps. But the design process is my enjoyment.
Few Design Tips You Should Keep In Mind
The fundamental concepts of graphic design are the same:
If you're applying a background color make sure that your fonts are clear.
Limit the number fonts you employ
Watch for pixelation when sizing images
Learn the fundamental Elements and the Fundamentals of Graphic Design
Also, keep in mind that you're creating your design in a circle. This is a new challenge, as a lot traditional designs are created in a square format. Concentrate your image on the circle's center. Keep any text or important elements intact.